Monday, October 18, 2021

Lessons In Humility

 It has been some time since I last wrote in this blog. Much has happened. 

My world has been turned upside down repeatedly the past few years, something I've chosen not to mention here. 
The things that have happened to me have allowed me to look inwards a bit more and accept limitations. Which is to say, I am learning to live with knowing what I don't know. 
After years of questions, I was finally properly diagnosed with autism spectrum disorder in late 2014, and in retrospect, this has shown a very bright light on all of my preceding life. That diagnosis, and the co-morbids, put my life in a whole new perspective. 

Which brings me to my astronomy.

These days, I am strictly visual. I never really got into astrophotography, the most I ever did was some video work. There is still so much of the sky that I haven't explored. 
I want to do this with my own eyes. 

Will I share things here? I'll try. But it seems now as though time is at a premium. There is still so much to learn. 

I want to know what I don't know, and even then, there are no guarantees that I'll know anything. 

Sunday, August 14, 2016

Overlooking The Moon

For most of my time being an amateur astronomer, I have been interested in observing certain deep sky objects, such as clusters and double stars. Occasionally, I observe the planets, especially the two largest gas giants. Most of the time, I've been interested in studying historic methods, as well as sharing how to make the most with the least. And since 2014, I have been steadily observing the Sun, and have made, at this point, well over six hundred journaled solid observations and sketches, the majority of which have been used to produce sunspot counts.
One thing I haven't done is ever really study the Moon.
In all of my nightly observations, the Moon has been, for most of it, something of a bane.
Certainly, I've looked at it, sketched it a couple of times, and many times have imaged it. But I've never really taken the time to study it.
Which, when you really think about it, is somewhat sad.
Here it is, the nearest celestial object to the Earth, something often romanticized, something occasionally derided, sitting a short distance away.
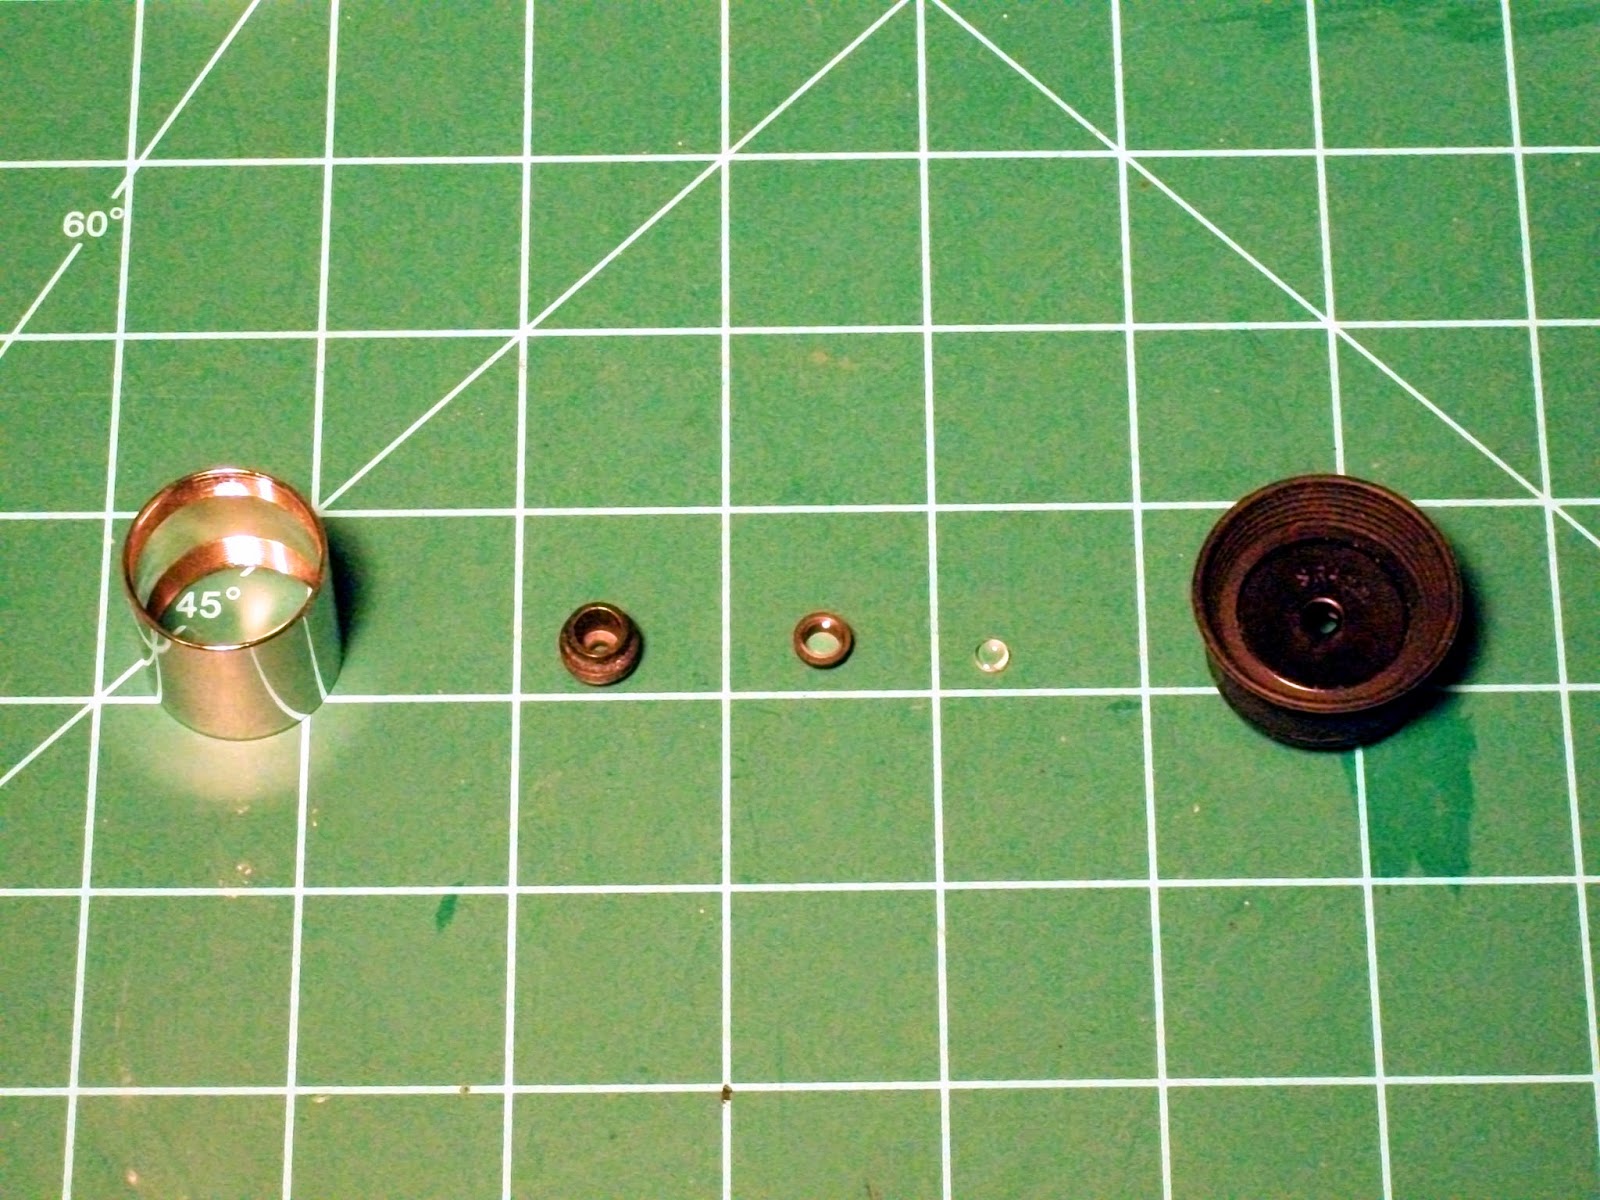
For the past week or so, I have been playing with an erect image eyepiece that proved to be the only salvageable part from a low cost telescope. It is technically an 18mm, and like many of the simpler designs, has a remarkably narrow field of view (I'd say less than 20°). Yet the images it produces are sharp.
Initially, I tested it out on my classic Tasco 6TE-5, "Amelia", a wonderful 50mm, f/12, and found that it produced some rather nice views, if a bit claustrophobic. I tested it out on a crescent Moon, working its way over the pine trees west of our property. I had to extend the eyepiece haphazardly beyond the end of the focuser, using the thumbscrew to hold on to the elongated eyepiece by a narrow margin.
It worked enough, though, to show me that there was some promise here.
Next, I tested it on a small Meade 40mm 40AZ-P that I am experimenting with, and then I crafted an adapter to use it in my 50mm Galileoscope, where it seemed most at home.
Most of these tests were aimed at the Moon for a number of reasons. Chief among these is the fact that it was simply there. The other reason had to do with one of the main problems of this design. The complex optics train greatly reduces the light that reaches the eye. The Moon is big and bright, and both Jupiter and Saturn were still as sharp as ever. However, deeper sky objects lost their brilliance. M7, an otherwise bright cluster, was reduced by half when viewed through the Galileoscope, and nearby M6 was a ghost.
The Moon, though, was another matter.
It was sharp and well defined. When the eyepiece was used with a 2x Barlow, something I'd never considered until now, the view, while still narrow, was very good.
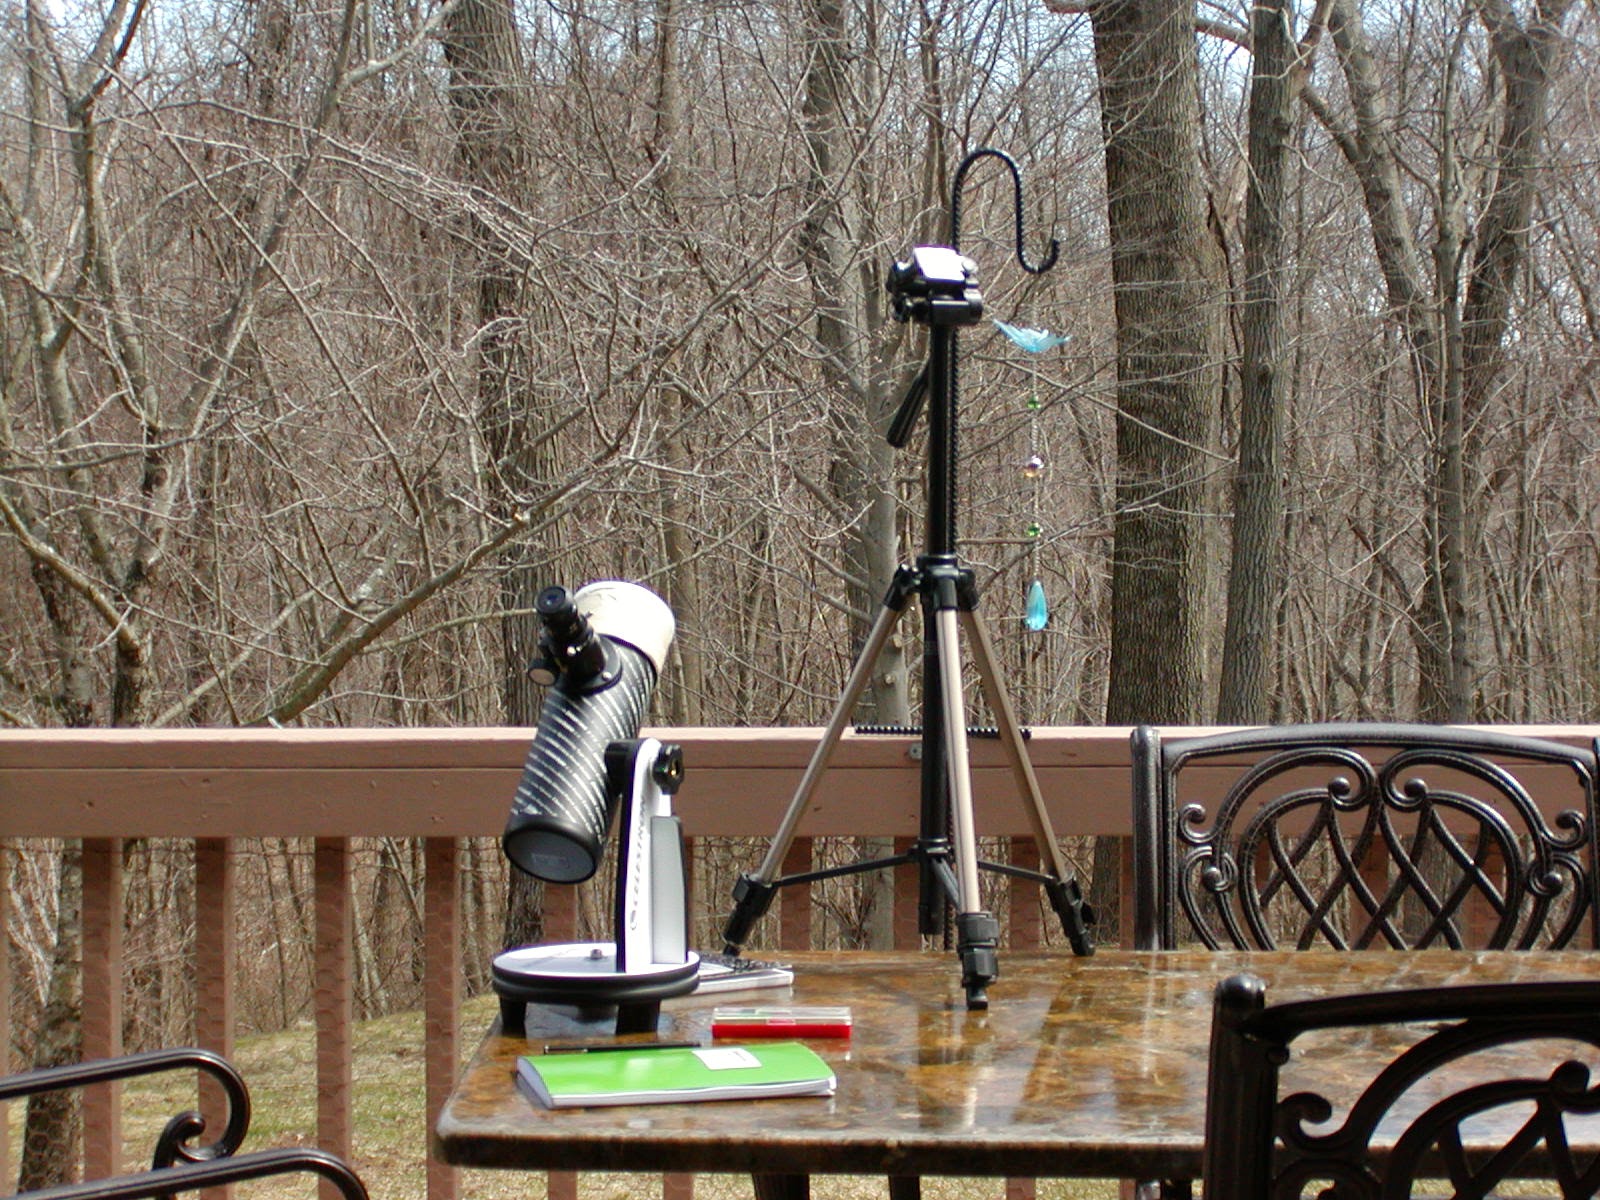
Last night, I decided to test the eyepiece out against my 45° erect image diagonal. I suppose that if one must have an erect image, this diagonal is certainly the best way to go, as you now have at your disposal a variety of eyepieces, though the angle take a bit of getting used to, at least for me. The telescope I chose for this was "Celeste", my Celestron 70mm f/10.
Again, an adapter had to be made to allow the erect image eyepiece to be used in the larger focuser. Since Celeste sits on a rather tall tripod, I thought that the viewing would be fairly easy. As it happened, the eyepiece and adapter extended the telescope even further, and the Moon, now near Sagittarius and a waxing gibbous, was higher in the sky. I had to slide down in my observing chair just to get my head to the eyepiece at all.
The view was certainly what I expected, however. Narrow FOV, but very sharp.
Next, I tried out the 45° diagonal with an 18mm Kellner. Naturally, the FOV expanded more than twice, but the target areas, the southern lunar highlands, were still very sharp, and to a degree more so.
Instead of demonstrating alternate viewing techniques, what these tests did more than ever was to inform me that I do not observe the Moon nearly enough.
I felt some awkwardness at the realization of this. A target I tell people to look at, on the the one hand, whilst simultaneously telling my more accomplished friends to avoid, is something I don't know well enough.
Perhaps the time has come to rectify this. Soon, not sure as to when, I am going to set out about observing a solid month of the Moon. This may be done on consecutive nights, it may be broken up over a period of weeks or months, who knows for sure.
But my lack of familiarization with our nearest neighbor in the universe is something I am going to actively seek to correct.

Sunday, August 07, 2016

Lessons From Leslie Peltier

Not too long ago, on advice from my friend Roger, I decided to start reading Leslie Peltier's autobiographical "Starlight Nights". Here, I must confess that I was only familiar with Peltier in passing. I was aware that he had written a great book on binocular astronomy, and that he was an early member of the AAVSO. Beyond that, the man was a mystery to me.
After I finished reading "Astronomy With An Opera-Glass" by Garrett P. Serviss a second (maybe third) time, I went over to this "Starlight Nights", and have been enthralled.
More than that, however, is the fact that he has touched upon some truths that I've often considered but never really have given much thought to.
The one thing that he stressed is that the best way to learn the night sky is directly, that is to say, by oneself. I suppose to a degree it is akin to that old adage from Benjamin Franklin; "Tell me and I forget, teach me and I may remember, involve me and I learn." The best way to learn the night sky is to simply go out and observe it.
The other take away I've gotten from the book so far is that the size of the instrument used to observe the night sky is really less important than the tenacity of the observer. As Serviss' book has demonstrated, something as small as an opera glass is sufficient. The great French astronomer Lucien Rudaux also felt that way. In Peltier's book, he goes into some length about how effective his first telescope, a humble 2" (50mm) terrestrial telescope was.
A terrestrial telescope, if you're not familiar with them, has a complicated optic train in order the create an erect image. From personal experience, I've found that the amount of light lost in one is quite high, certainly more so than an equivalent sized astronomical telescope.
Yet he was able to view and achieve quite a bit with this instrument. It would be easy to say it was his location, the rural reaches of Ohio, or the time period, the early 20th century, that enabled him to accomplish what he did. Perhaps so.
Though I am tempted to say balderdash.
I live in an area where, to my south, is the booming metropolis of Jacksonville, Florida. To my northeast are two paper mills that run twenty four hours a day. Nearby is a shopping area, and my own neighborhood has those bothersome sodium streetlights.
Yet I have been able to see quite a bit.
Certainly, some of the more distant objects are lost. I don't see much in the way of galaxies here, and some of the fainter deep sky objects are all but invisible. But the wonders are there.
It just requires tenacity coupled with the act of simply looking.

Sunday, July 10, 2016

Solar Adventures With Opera and Field Glass

If you've been reading the blog, you know that I've been thinking about "retro-astronomy" a bit. Recently, I decided to read, once more, Garrett Serviss' classic, "Astronomy With An Opera-Glass". My copy is over a century old now, so I find myself alternating between its delicate pages and an ebook version on my Kindle. The way it is written is a sheer delight, a peek at the way popular astronomy was handled at the time, and you can see within its pages how it was evolving.
In the last section of the book, Serviss deals with the Moon, the planets, and lastly the Sun.
The method that Serviss recommends for observing the Sun is the use of smoked glass over the eyepieces. This is pretty similar to the same method used by astronomers for some time at that point, though of course it wasn't the only one.
I could go into many reasons why this is pro and con. Today, of course, one could simply put a solar filter over the objective lenses and be set.
What puzzled me, though, was why Serviss didn't recommend solar projection.
Admittedly, with low magnification, the image would be small, but if the room where the image was projected was dark enough, the surface onto which the image was projected could be set far enough away so as to present a decent sized image.
The problem, though, is one of resolution. I've found that direct observation, by means of a solar filter and a decent sized instrument (even as small as 35mm) is best. For projection, the instrument has to be larger, at least 40mm, to present a clear image.
The other concern is the size of the spots that may be on the Sun. Smaller ones will not show up in low resolution projections. The day this was written, 10th July, 2016, the Sun only had three sunspot regions on its surface, and all of them were small.

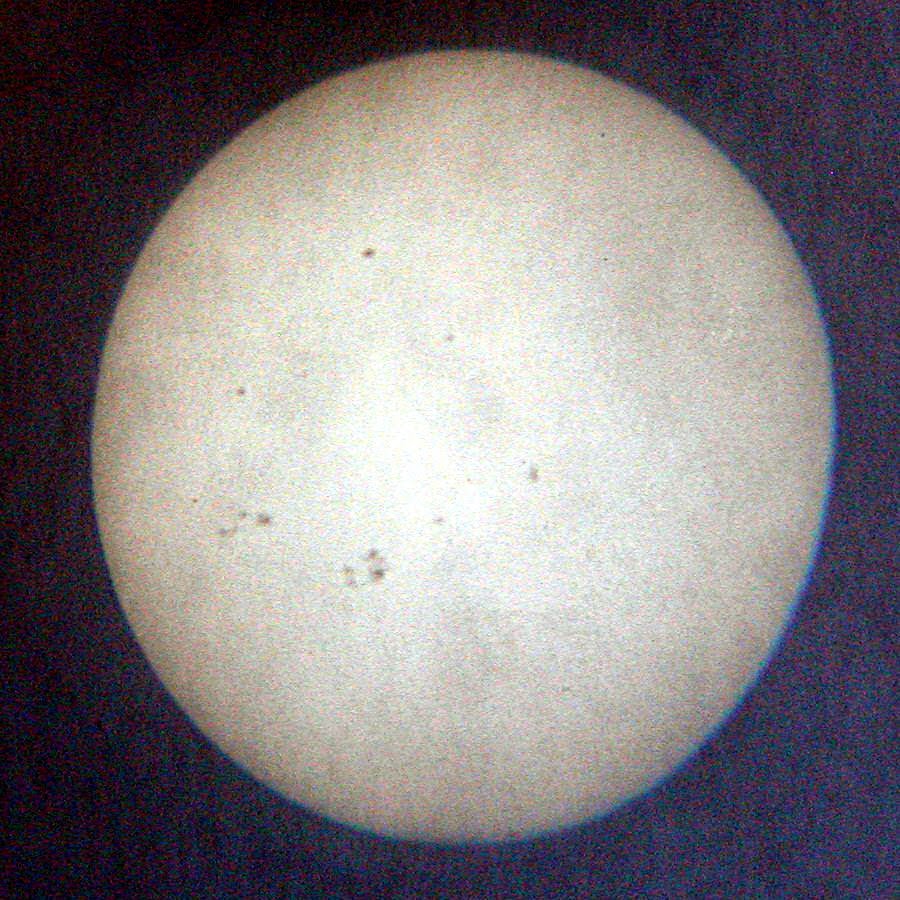
An afocal shot of the Sun taken the morning of 10th July, 2016. Camera was a Kodak C180, telescope a Tasco 50mm 6TE-5 with an 18mm Plossl eyepiece. Processing done in Gimp. Image by the author.

This doesn't mean that solar projection with an opera or field glass can't be done, of course. These are merely some of the challenges. 
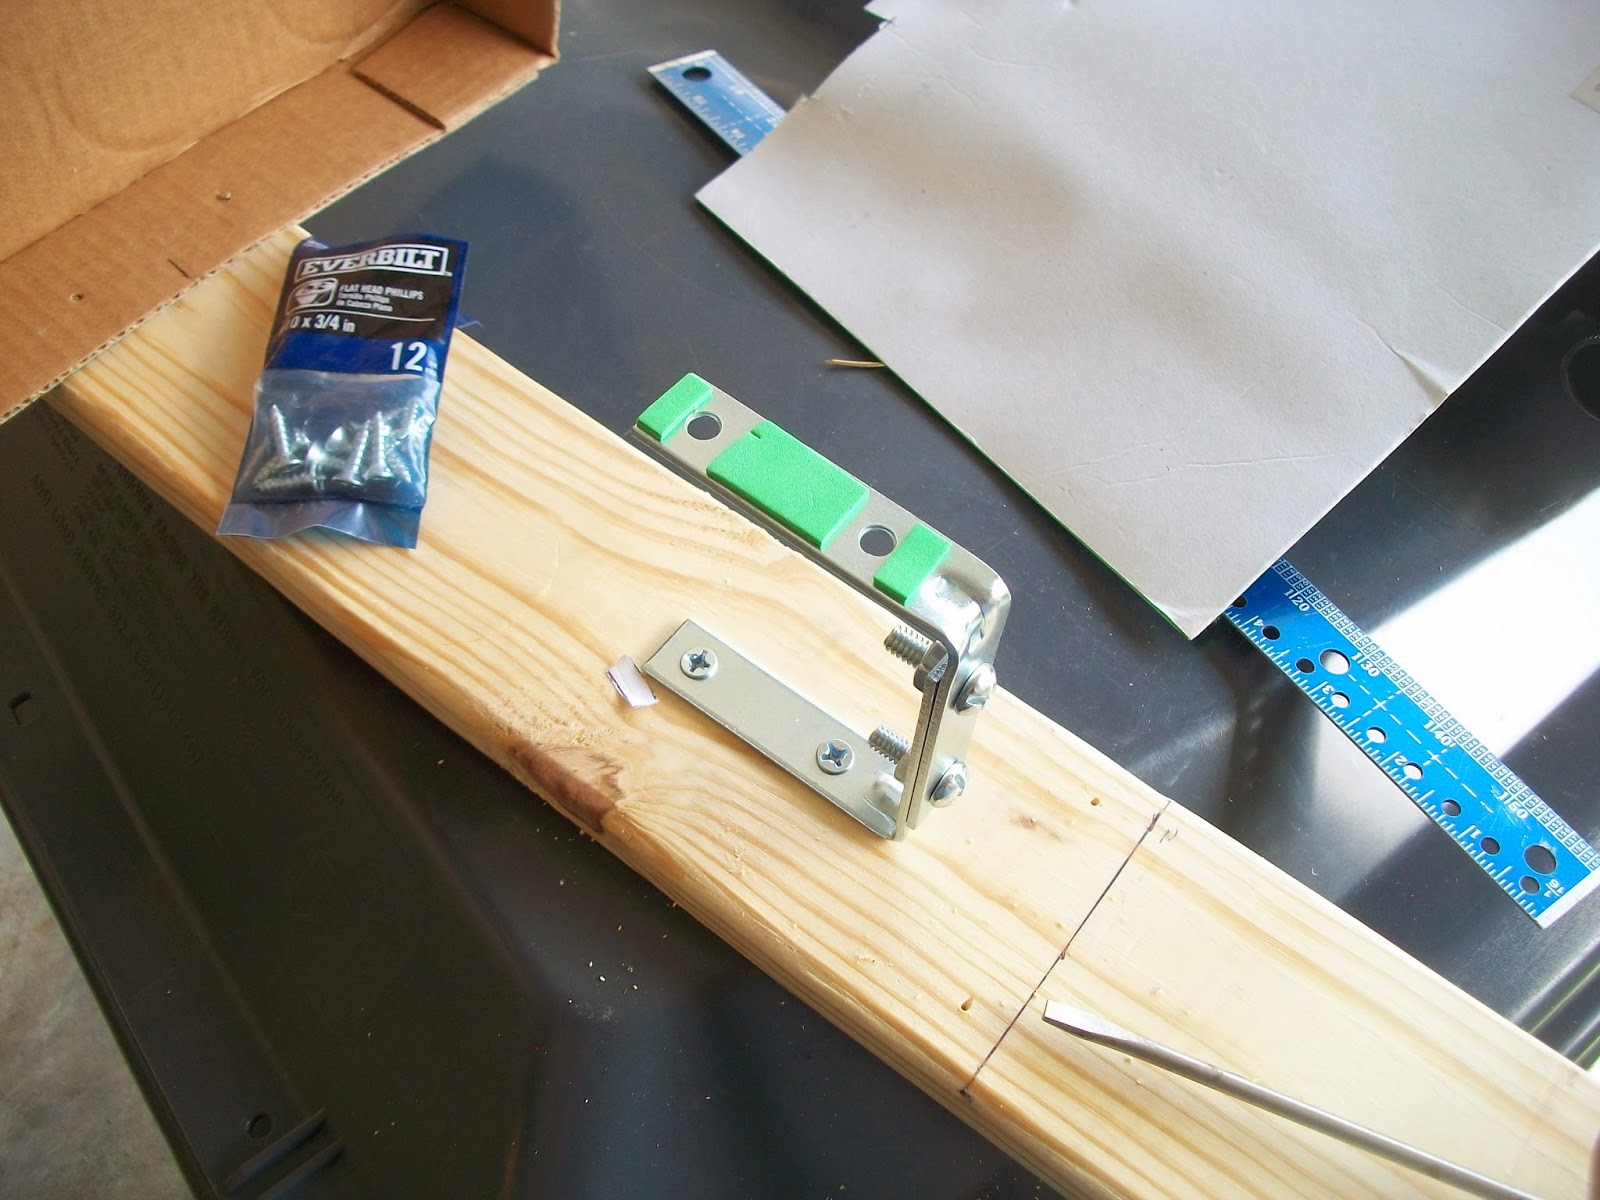
I decided to investigate this on my own. The first thing I did was to cobble together a mount on a tripod. For this, I used some corner brackets, a 4" and a 1 1/2" (100mm and 38mm). The larger bracket was bolted to the tripod head with a 1/4"-20 nut, and then the smaller bracket to the larger one, aimed backwards. This would be my main mount.
For each instrument used, a different method of attachment was required. This was done with a combination of steel straps, bolts, nuts, and coat hanger wire. The first instrument used, my old Lemaire opera-glass, was fairly straight forward, using just the steel strap and a bolt with a wing nut.

This glass has very low magnification, around 3x, so the projected image was expected to be small. For my "screen", a piece of Crescent Board was taped to another tripod head.


As expected, the image was small.


But it was sharp. It is very likely that larger spots can be seen here (though, of course, the current batch of small regions would not be).
The next instrument used was my Airguide 4x40mm field glass. This required both a strap and coat hanger wire.


While the objectives in the Airguide are achromats, they are not the best, especially on bright targets. The Sun is, of course, very bright.


The Sun's image was so bright, in fact, that it was hard to get a sharp focus. 


Is it likely that direct observation with a solar filter with this instrument would yield better results? Perhaps. That would be something to test at another time.
These tests, though, prove that it was possible to observe the Sun using a different, and safer, method that was available. More than likely, if anyone was to undertake this, it would have been best done either in the morning or at sunset, with the Sun at a ow angle, and projecting the image into a darkened room at a distance. More importantly, however is that it could be done.
Perhaps, soon, I'll attempt to try that method. For now, it is enough to know that it could have worked.

Tuesday, June 28, 2016

Thoughts On Opera Glass

In 2004, during my first visit to the Wolf's Head Bookstore in St. Augustine, Florida, following my return to the state, I picked up a classic book by Garrett P. Serviss, "Astronomy With An Opera-Glass". This was an older edition, from 1910, making it now over a century old. It is still in great shape, and was then, but because it had been a library book, the price was low.
Anyway, it is a wonderful book, one of the first really written for the average person using tools that were easily available, an opera glass. The author suggested that the reader obtain at least a 1 1/2", 4x power pair. As it turned out, these were somewhat  common, though not particularly inexpensive at the time the book was originally written (1888).
I set the book into my astronomy shelf at the time, and considered it something of a curiosity more than anything else.
Not quite a year later, I chanced upon a Lemaire Fabt. opera glass at a community yard sale. It was only a couple of dollars, so it came home with me. The book came back off the shelf.
Since that time, I have been interested in the way the night sky was enjoyed in previous eras, and especially with earlier instruments. The opera glass, and its brethren, have allowed many thousands of people to view the night sky without the heavier commitment of a telescope. After all, you could always go back to using them for other things, whereas a telescope is a bit more specialized.
But it wasn't enough for me to be interested, I wanted to have the experience as well. The opera glass I bought at the yard sale was a little smaller than the ones that Serviss recommended. A short time later, I found a pair of Tasco mini binoculars that were really not modern binoculars at all, but field glasses. Like the smaller Lemaire opera glass, these consisted of two objective lenses and two simple concave negative lenses for eyepieces, effectively Galilean. Aside from size, the modern Tasco pair had another advantage, in that the objective lenses were true achromats, not the simple single convex lens of the older Lemaire opera glass.
That didn't prevent the Tasco from being useful for getting an idea of what Serviss wrote about a century before. My first night with them provided me with views of the Hyades, the stars that make up the head of Taurus, or a faint view of the milkiness of the Great Orion Nebula.
However, this was still not an honest experience. The objective lenses in the Tasco were coated optics, something relatively unknown at the time. Even though the objectives were smaller in diameter than what Serviss recommended (30mm, a little less than 1 1/4", versus the 1 1/2" Serviss recommended), the views were probably better. What I needed were some genuine field glasses of the older optic design.
A few years back, I found such a pair, from the Chicago based company Airguide. These were 4x40mm, with the old Galilean layout and simple objectives. They are from the 1940's or 50's, but are really not much different from what Serviss wrote about.
What can you see through these?
Galilean optics, by their nature, have a narrower field of view, and that's the case with all three of the instruments, but especially so with the Airguide. Nonetheless, the views were precisely what he wrote about, accounting for some light pollution.
I've written about this before here, how I've been into "retro-astronomy". It isn't something I suspect that everyone will be into, but it is a learning, and indeed, a humbling, experience. That they were able to accomplish so much with the simple tools they had at their disposal says much about their determination. Astronomy has evolved, and we take so much for granted today. Even some of the instruments we deride as garbage were better than what they had to work with many times.
That's what this taught me, and it helped me to be a better astronomer as a result. 


Saturday, January 17, 2015

Old & New - Just A Thought

Back in late 2008, when I built my "facsimile" Galilean telescope, I was amazed... no, make that appalled... at how poor the optic design was. Yet, this was remarkably similar to one of Galileo's telescopes that still exists to this day, in fact better. Was I able to replicate some of his findings? Of course, but the simple fact is telescopes from that very early period were tremendously lacking.
Which brings me to my current work in studying early telescopic sunspot observations. 
So far, it appears a typical 17th century telescope has difficulty in finding any small sunspots at all. For instance, yesterday the only sunspot groups that were visible through my regular solar telescope "Beatrix" were AR2259 and AR2261. The former group not only had the larger count (eight), but also the larger spots, whilst the latter was only represented by one, small, visible spot.
"Christoph", my research telescope (50mm f/20, stopped to 25mm thus making it f/40) could only reveal AR2259, and just its two largest components. AR2261 simply was not there. In both configurations, Galilean and Keplerian, When my Galileoscope, the control for this project (50mm f/10, likewise stopped to 25mm, f/20) was mounted in the helioscope, the view greatly improved, though was still a bit lacking. Again, only AR2259 was visible, as were its two larger components. However, not only was the image far sharper, the smaller spots within that groups were on the edge of visibility, as was AR2261, and that in both configurations. 
While I know that many serious amateur astronomers tend to deride the Galileoscope and other smaller instruments as either teaching tools only or mere toys, the fact is that they were far superior to what was available to average astronomers for almost two centuries. 
These are far from mere toys when properly used.

Saturday, December 20, 2014

The Scheiner Method, Revisited

My interests in the very early history of solar astronomy has been documented on these pages before. I wanted to explore some more, so I set out to replicate the early solar telescope designs of Christoph Scheiner
While many of his theories about cosmology were wrong (he was an ardent supporter of the geocentric model that the Catholic Church at the time held as dogma), and he was initially wrong about sunspots, he did produce the first practical solar telescope. 
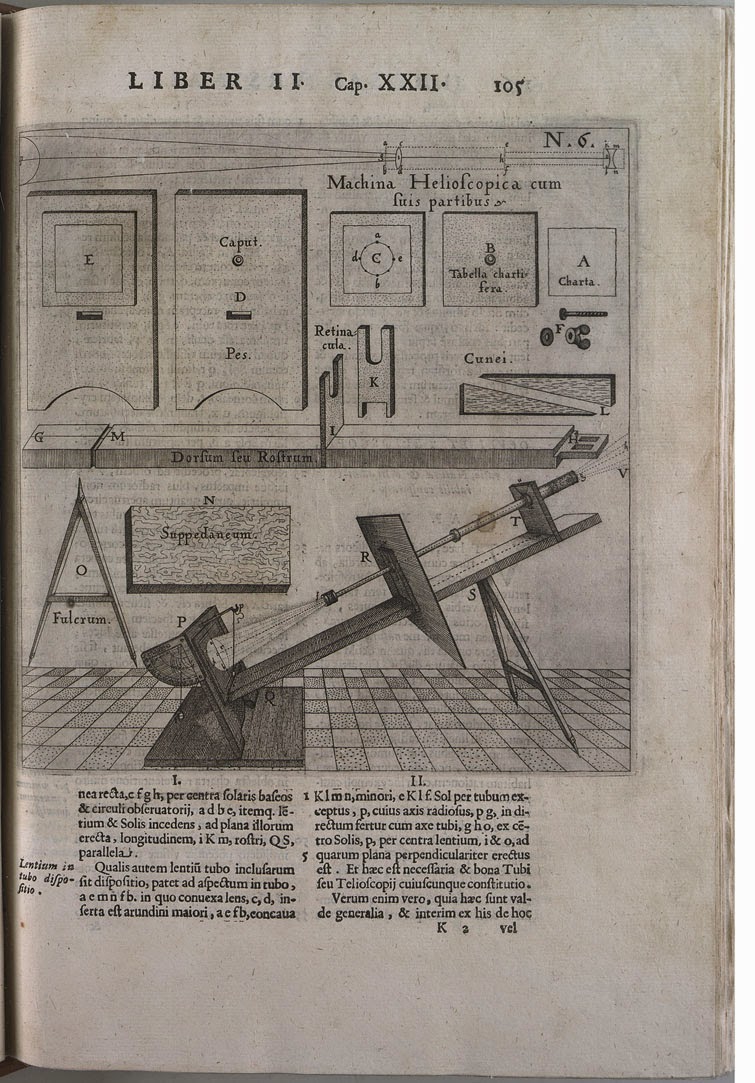
He called it "machina helioscopica".
The design went through two iterations, as found in the pages of Scheiner's work "Rosa Ursina". The initial design simply had the helioscope supported by two legs.

Image from "Rosa Ursina", courtesy Wikipedia

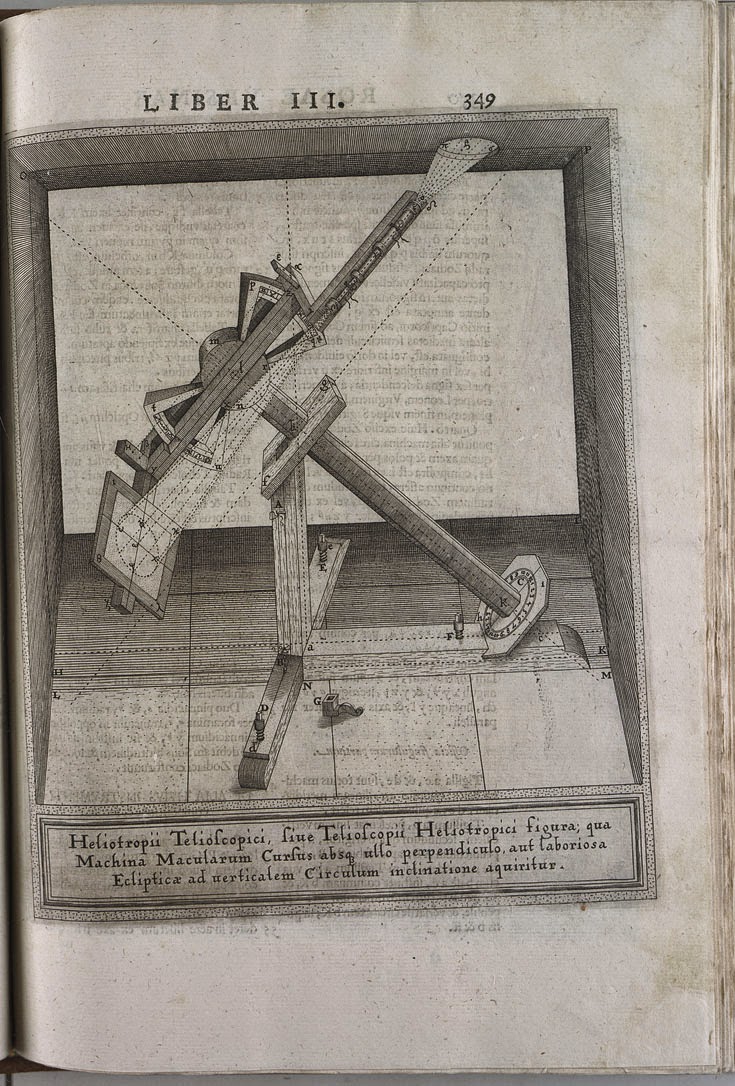
Later, he improved the design, making in the process one of the first equatorial mounts.

Image from "Rosa Ursina", courtesy Wikipedia

Common to both is how the telescope and screen are joined in unison, a backbone of sorts. This technique is still in use to this day for solar studies, namely sunspot counts.
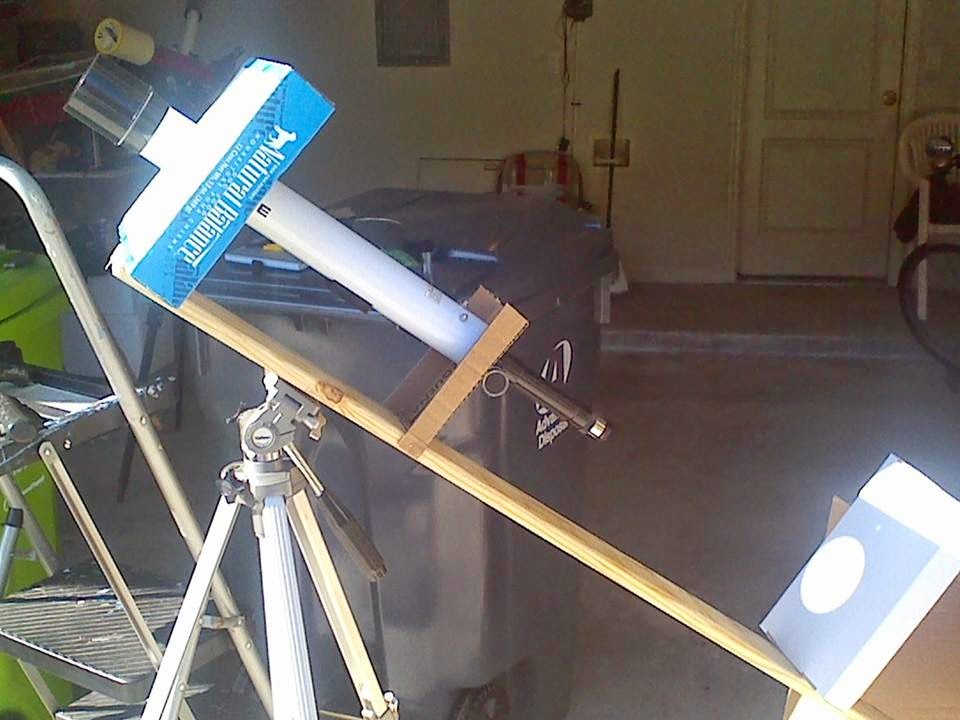
I set out to make an improved version over my experiments in 2013. This will ultimately lead to a permanent setup, akin to his later design. For now, the setup will be like his earlier design.
I used a piece of lumber, a 1"x4"x60" (25mm x 100mm x 1.524 meters) as the backbone. 
My initial setup was with cardboard, a proof of concept, to see how the entire design would work.
Two of my telescopes were used for this first test setup; my old Tasco 25x-50x 40mm zoom telescope-


And a Meade 40mm f/15-


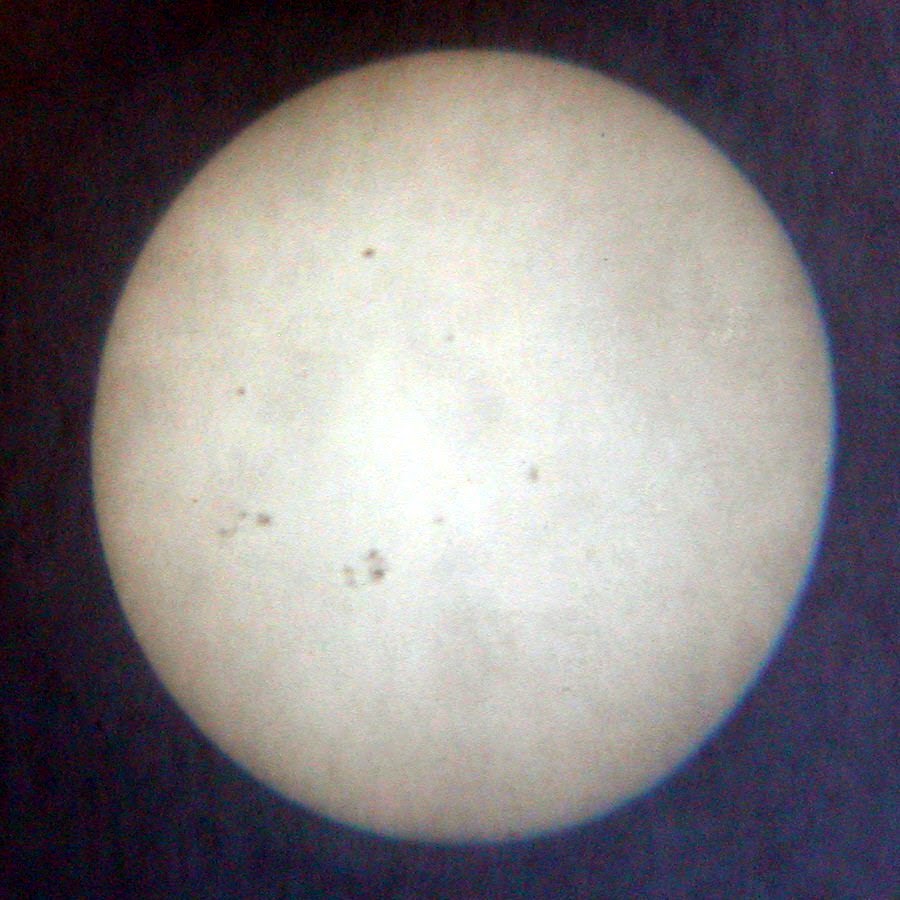
Both telescopes worked well. There were concerns about the Tasco telescope, however. When first used, the images were a little dark. However, when used again, the images seem to work better, definitely more contrast. Incidentally, these images do not do these images justice.

Initial Tasco zoom telescope image, with levels adjusted.
This is how it appears to the eye.

The image processed a little further to bring out details.

The positions for all the components were worked out. 


For instance, I discovered that I needed the projection screen closer, as I planned to use a smaller one, for projection of a 100 to 125mm solar disk.
Once all of the positions were determined, work on the improved helioscope began in earnest. This mount would be designed to hold the telescope in two methods; either with a 1/4"-20 bolt, or a hose clamp. To make that mount, two 4" (100mm) "L" brackets were bolted together to form a "U" bracket. This bracket was then attached to the helioscope backbone with screws. Once in place, pieces of self adhesive foam rubber were attached to the mounting surface, to protect the telescopes. The hose clamp would also be likewise covered over most of its inner surface with the rubber foam, allowing space for adjustments.


For the forward mask, I used a piece of 18" x 14" (45cm x 35cm) Corroplast sign material, cut in half to make two 9" x 14" (22.5cm x 35cm) pieces. A 2" (50mm) opening was cut in the center of the mask. As designed, the helioscope will mount the Tasco perfectly. Once satisfied, the mask was attached with smaller "L" brackets.


Once the mask was in place, it was necessary to test the distances again to the projection screen. While the design was built around the Tasco zoom telescope, I felt it necessary to test the distance with other telescopes. To that end, the Galileoscope was used, sans its forward dew/glare shield. I was reticent to do so, knowing how the Galileo's 20mm Plossl was damaged the last time it was used for solar projection. While it didn't line up perfectly with the opening (it is a larger diameter), it did provide the necessary information.


For the projection screen, I chose a small clipboard. To mount it to the backbone, I used another 4"/100mm "L" bracket. While the bolt head does look like it would interfere, for the sized paper that will be used on this design, it really isn't a problem. With the clipboard mounted, the backbone was completed.


As luck would have it, when it came time to test the design, the weather turned fickle. However, initial tests with the Tasco telescope proved satisfactory.


The images it produced were again fairly sharp, especially when set to 40x magnification.


The problem is that the Tasco has a far more complex optic train than Scheiner would have used. It is a terrestrial telescope with a number of elements between the objective lens and the eyepiece. Scheiner would have used a Keplerian telescope with a very simple optic train, just two convex lenses, in fact. While I currently lack Keplerian eyepieces of the correct focal length, the Galileoscope with its 20mm Plossl is sufficient.


Eventually, this design will be setup with a permanent host telescope, no doubt on an equatorial similar to Scheiner's later design. In the meantime, I can use this setup for investigations into those early methods, which laid out the path that we follow to this day. 
In short, it worked. And still does. 

Sunday, October 19, 2014

The Galileoscope Revisited - Doing More


The Galileoscope has been with us now for five years. Some in the amateur astronomy community have embraced the small 50mm telescope, while others still view it as an educational tool only, and only a mediocre telescope at best. Personally speaking, I sort of belong to both groups, having found that the telescope has plenty of use, but far from mediocre.
I have used my telescope for a number of projects, and have even extended its use. In that time, I have learned the following.

1. Other eyepieces - Since the Galileoscope uses the standard 1 1/4" diameter, other eyepieces can be used. Caveat: weight. Since the eyepieces are simply a friction fit, it is crucial to limit weight.
2. Diagonals - Not exactly. You can use a diagonal if you use a Barlow ahead of the diagonal. Again, the problem is weight. While I converted a commercial eyepiece by adding a 29mm plano concave lens, this isn't always practical. The Galileoscope could of course be modified by shortening it up, but this is probably more trouble than it is worth. Best avoided.
3. Barlows - Yes. The Galileoscope already comes with a simple Barlow, and other commercial units can be used. In the image, a small inexpensive (and lightweight) Meade 2x Barlow is being used. Again, the biggest problem is weight. 

4. Solar work - Certainly. While I caution users about problems with the projection method, others have reported success. My preferred method is with a solar filter. Baader film is inexpensive, and it is easy to build a solar filter. 
5. Tripod and other mounting systems - The Galileoscope works best as a straight through, traditional telescope. Depending upon what you plan on viewing, you could find yourself being contorted into some extremely odd angles. When it comes to tripods, the taller, the better with the Galileoscope. Using a chair to effectively sit under the telescope is recommended. A tripod will probably be the single most expensive purchase you could make in conjunction with this telescope. Certainly, there are probably other ways you could mount this telescope, depending upon how imaginative the user is.

There are still plenty of projects planned for my Galileoscope. As the top image shows, recently, it was used in alongside my main sunspot telescope, a Monolux 60mm f/7.5 I call "Bianca", and it performed flawlessly. Who knows, I may one day use it for a Messier hunt. As an experimenter's telescope, I believe that it is without peer for its small size.

Monday, October 06, 2014

The Celestron FirstScope Reevaluated


Being an advocate for smaller telescopes is sometimes a daunting task. I am as guilty as others when it comes to the aperture game. When I had larger aperture telescopes at my disposal, the smaller instruments just didn't seem up to the task. It took some retrospect to once more find utility in those smaller telescopes.
My definition of "small" is anything less than 200mm (8 inch) aperture. This means that the great bulk of amateur telescopes falls into that category; professionals have another definition for small, of course. "Smaller" is anything with less than a 152mm (6 inch) aperture. This is the realm of most beginner telescopes, including the nearly ubiquitous 60mm.
60mm has its limitations, of course, and some companies have endeavoured to create beginners telescopes of a larger aperture whilst keeping the price down.
Thus enters the 76mm Celestron FirstScope, and similar Orion FunScope.
My initial assessment of the FirstScope was perhaps a little flattering. It was the first telescope I had purchased new in some time, even if it was a bit  less than $50 USD. It was a design I like; in effect, a tabletop Dobsonian. It was cleverly designed and seemed sturdy enough. I looked forward to putting it to immediate use.
Which is what I did, after a cursory test of the optics. 
The one eyepiece I was certain was going to give me grief on the little telescope was the 4mm SR (which I wrote about not long ago). It was put aside. I did try the 20mm Huygens, and it performed well enough, I thought, but it too was to be put aside. Instead, the FirstScope was used with some of my better Kellners, an 18mm and 20mm. That has been the situation ever since, and I have been quite happy.
But that is not an honest assesment of the telescope out of the box.
After reading a few more reviews for the FirstScope, most of which agreed with my findings, though a couple were particularly critical, I decided it was time to reevaluate the little scope with both of its original eyepieces, and then with some of the least expensive commercial eyepieces available.
I should stress that my FirstScope still lacks a finder. For the low magnification that it is used at, it is easier to look down the tube and use a lower power eyepiece to help locate the target.
However, the first test was with the 4mm (actually 5mm) SR. As expected, poor. It was extremely difficult to focus. Even with an inexpenive Meade 2x Barlow (the kind one finds in their smaller telescopes), "forcing" a longer focal length, it was still difficult, even for an object like the Moon. That eyepiece is best with longer focal length telescopes.
The 20mm H was better (not really that hard, considering), but had distortion near the edges. No surprise again; I've used this eyepiece with my longer focal length refractors and it works better, though still with a narrower field of view. With the 2x Barlow, it performed slightly better, though only slightly.
My next eyepieces are typically found in some of Meade's smaller telescopes, starting with the Meade 17.5mm MA (Modified Achromat). This eyepiece performed far better than expected. The field was much better, though a little distortion persisted again towards the edge. With the Barlow, that distortion was even less. Color was good as well. 
The final eyepiece was a Meade 20mm Kellner. This performed well, though I thought it possessed more edge distortion than the MA. This was alleviated somewhat with the Barlow.

Conclusion - 

What did I learn from this? 
For one, the FirstScope performs better with better eyepieces, bottom line. While Celestron included two eyepieces that would normally be found in their inexpensive 60mm telescopes, they were not suited for this telescope. As some of the others have observed, I could not recommend the accessory kit for the FirstScope as well. The money spent for that would be far better spent on obtaining better eyepieces. The other option would be to buy the almost identical Orion FunScope. According to reviews, it includes a couple of three element eyepieces that are far better performers. Also included in the price is a red dot finder, which is a far better choice for this design. In the end, however, I maintain that this little telescope is a fine performer, as long as its limitations are understood.

Thursday, September 25, 2014

The SR Eyepiece Reconsidered

The SR eyepieces for this comparison.
Left to right, the Meade tall .965" 4mm "SR", the Meade
.965" short 4mm SR, and the Celestron 1 1/4":4mm (5mm) SR.
Recently, I came across a rather harsh thorough review of the Celestron FirstScope 76mm table top Newtonian. While I did not necessarily agree with all of the author's findings, one item stood out; he rated the 4mm SR included in the telescope rather highly. 
SR eyepieces have not been generally appreciated in my experience. They have very poor eye relief, the images are frequently dark and murky, the view is narrow. Most of my SR eyepieces have ended up either in the spares box or the parts bin. To be honest, based upon my experience with smaller SR eyepieces, I simply did a cursory test of the Celestron 4mm model, and it too ended up in spares.
Perhaps I should have tried it again. Most of my astronomy has been solar, deep sky (clusters primarily), and lunar, with a smattering of planetary work. I tend to use optically friendlier eyepieces, in my case a number of Kellners and a Plossl or two. Higher magnifications have seldom been used. The SR eyepieces have been there if I needed them. I seldom have.
Let us look for a moment at what an SR eyepiece technically is. I've come across several definitions for "SR"; "symmetrical Ramsden", "super Ramsden", "achromatic Ramsden", and simply "symmetrical". The classic Ramsden design consists of two plano convex lenses. For the unfamiliar, plano convex are flat on one side, convex on the other. In the Ramsden design, the flat sides face "out", with the field lens (forward) larger in diameter and with a longer focal length than the eye lens (rear), with a space between them. There is a specific formula for this, but for now we'll simply deal with the design's geometry. 
As it turns out, while most of those definitions are probably incorrect; they are certainly "symmetrical" in some sense, but have very little else in common with the "Ramsden" design aside from having two elements. 
To that end, I decided to take apart each of my SR eyepieces to study their construction. By the way, this is not something I recommend doing. It is very easy to to get dust on the lenses, and when dealing with such small focal lengths the result is dreadful.
The 1 1/4" Celestron 4mm SR, which actually yields a focal length closer to 5mm (as initially confirmed in the linked article), appears to have two symmetrical convex lenses of similar diameter.


The field lens looks identical to the eye lens, but may have a slightly longer focal length. Beyond that, this eyepiece has more in common with what was once called the continental variant of the even older Huygens eyepiece Both lenses are double convex. The only exception is how similar the lenses are to one another. 
How then does the 1 1/4" Celestron 4mm (5mm) SR compare in design to a smaller .965" version?
Currently I have two that are still intact and in use, and both were imported by Meade at various times. Externally, they look different, with one being longer.


I decided to open the shorter one up first. Again, I was greeted with two lenses, but much smaller in diameter than those found in the newer Celestron 1 1/4" design. They can only be described as tiny, around 3.5mm in diameter a piece. Like the Celestron lenses, both were double convex, and again the field lens apparently had a slightly longer focal length. But again, they were extremely small. This will explain much, as you will read later.


How about the taller .965" Meade 4mm SR? One thing that stands out immediately is the diameter of the field lens opening. It is close to twice the diameter of the one found on the smaller SR. In construction, however, there is a big difference. When opened, there is another lens.


Ahead of the field lens is a double concave. In effect, this forward lens serves as a built in Barlow, increasing the magnification. Otherwise, the construction of this SR is almost the same, though using larger lenses than the ones found in the shorter .965" SR. The spacing between the field and eye lense, however, is rather close, being more akin to simplified symmetrical eyepiece.
Optically, how do they compare?
For the test, I used my 60mm f/7.5 refractor "Bianca" and chose the top of a nearby pine as a target. 
As expected, the Celestron model provided a nice, bright image that was fairly crisp, though typical with the design the eye relief was a little poor. The shorter Meade SR, with its small lenses, had a narrower view and poorer eye relief. The view was adequate, with a slight discoloration at the edges. For stellar work, this is fine, provided the target is centered.
I was not quite sure how the taller faux SR would compare, as I had never really used it. I expected it to be somewhat darker, as smaller, simpler Barlow lenses tend to produce that. Not surprisingly, it was indeed darker and narrower than the Celestron version, though the eye relief was better. It makes one wonder how would this eyepiece behave without the Barlow? Would it create an 8mm eyepiece of some sort?
This little test proved that sometimes judging an eyepiece by its designation is tricky. SR eyepieces, regardless of what SR really means, are a mixed bag. The newer, cheaper, smaller .965" are iffy at best, while the larger 1 1/4" Celestron model is a fairly decent performer. The only real test is with the individual. The older .965" standard is fading, and chances are likely that the only time you'll encounter them is on older equipment, or very inexpensive equipment. It is probably best to err on the side of caution and go with the better performer. In this case, that would be the Celestron. Just remember, it is closer to 5mm than 4mm.

Sunday, June 15, 2014

Solar Astronomy, My Way

Bianca, my current choice for observing the Sun
In this digital age, we have become perhaps too reliant on things being available to us in an instant. I'm as guilty as anyone else in that regard; I have scanners and digital cameras and all sorts of image processing software, as well as specialized (albeit lower tech) video gear for my telescopes. 
Yet here I am, everyday before noon if possible, setting up my old 60mm, 450mm FL telescope "Bianca", complete with solar filter and 9mm Kellner eyepiece, to study, and sketch, the Sun.

The business end. My old scratch built Baader film solar filter.
The goals here are multiple. Chief among them is the simple task of improving my observation skills. When you set out to draw something, you it pay a lot of attention. True, I can be remarkably fastidious when it comes to noting small details. Doing so when the subject is in the night sky, and being observed directly, is another matter entirely.
The other goal is to improve my ability to record the information. Currently, I have three astronomical journals. The first is for written record. The second and third are for the visual recording of observations, with the second being specifically for solar observations. 
This is my so called "Green Book".
All of my journals are simple composition books, but numbers two and three are graph ruled, 5mm to the square. I use an old COX (an office supply company from Taiwan) compass for drawing my solar disk, and have set a standard radius of 76mm (3 inches) inside the front. I also do my best to ensure that the circles are all set in the exact same position on each page.


I did say I could be fastidious.
After each observation, I compare my data to the information at SpaceWeather.com. This is to double check on my alignment and number of spots observed. I miss some, make no mistake, but keep my observations true; no corrections are made.
Since early April, I have been keeping a steady log of the Sun. To date (15th June, 2014), I have recorded forty four complete observations. I hope to fill this journal by year's end, weather permitting.
Again, this isn't to say that using digital methods is bad and that I am a Luddite of sorts. Far from it. The idea here is to improve my ability as an observer. When it comes to astronomy, that is something we should all strive for.

Wednesday, June 04, 2014

Just A Little Note About Eyepieces

There's no substituting good eyepieces.
Aside from being a somewhat awkwardly phrased sentence, it is an utter truth. At a minimum, you need three eyepieces for any telescope. Years of practice, experience, and standing on the shoulders of giants has taught me that.
Traditionally, and for a very long time, most telescopes came with Huygenian eyepieces. These simple, two element eyepieces are just okay, and not much better. Their biggest problem is eye relief, making viewing through them a less than desirable experience. I use them, to be honest, but I don't really recommend them. The lowest quality eyepiece I recommend is a Kellner. Think of this as an evolved Huygenian eyepiece with better eye relief and a much better field of view. Next up the ladder, and still very affordable, are Plossls. From there, you start to climb somewhat in expense and complexity, almost always corresponding with better viewing.
Yet I still use cheap eyepieces and accessories. Why?
I don't know, perhaps I'm lazy.
Here I am, in Charlotte Hall, Maryland, and the one eyepiece I choose to bring is a 9mm Kellner. This isn't so bad, but I've chosen to couple it with an inexpensive 2x Barlow, one that appears to be a single element, a lone plano-concave lens.
And it is not quite okay.
For stellar work, it seems to be okay, though just slightly. However, for planetary work (and right now, the evening sky is blessed with three planets to choose from), it fails miserably, at least in combination with my old Monolux 60mm F7.5 "Bianca".
The lesson here?
I have a much better Orion 2x Barlow. Use it.
Live and learn.
After all, there is no substituting good eyepieces.

Monday, April 14, 2014

The Blood Red Moon & The Tetrad

The total lunar eclipse of 20-21 February, 2008,
as seen from one of my CCTV cameras.
The Moon is just entering the umbra. 
Before the sun rises on Tuesday, the 15th of April, 2014, the Moon will have gone through the first of four total lunar eclipses that will be visible from the Americas. There is a lot of confusion arising from this, apparently, and some misinformation floating about.
After all, it's not like total lunar eclipses are very rare events. But first, let's talk about the actual eclipse itself. 
For those of us on the east coast, the eclipse begins at 1:20 AM EDT, according to the folks at "Sky &; Telescope". Other sources list this time as closer to 2:00 AM EDT. Regardless, this is the penumbra portion of the eclipse, and for the most part is barely noticeable. The Moon really begins to darken at 1:58 AM EDT; this is the beginning of the real eclipse. Slowly, the Moon will continue to move eastward in our sky (contrary to the direction the sky's moving, in fact, and with the Earth's rotation), until 3:47 AM EDT, when it will be mid-eclipse, deep within the umbra portion of the Earth's shadow. But it is not going to be dead center in our shadow; it will be off and towards the south. This should be manifest in a southern section of the lunar disk that is brighter, the variable being cloud cover on our planet, which effects the light that shines around the edge of our planet. This light is being lensed through our atmosphere. If the Earth did not have an atmosphere, a lunar eclipse would in fact be total as long as it passed through the Earth umbra. 
The total portion of the eclipse ends at 4:25 AM EDT, as the Moon begins exiting the umbra portion of the Earth's shadow and begins getting brighter. The final partial portion of the eclipse ends for us here on the east coast at 5:33 AM EDT (earlier for us here in New England; due to the fact that we are further east, the Moon will be setting, and the Sun rising, of course). For our friends just a little further west, the entire eclipse will be visible. For the most part, though, both North and South America will see a total eclipse, for again as I mentioned, the penumbra eclipse really isn't that noticeable.
Now on to the bad information that's floating around.

Eclipse visibility chart from the
Wikipedia entry for the 15th April 2014 lunar eclipse.
(Image couresy Wikipedia)
First, unlike a solar eclipse, it doesn't matter where you are during a lunar eclipse. From Boston, you will see the same part of the eclipse as Buenos Aires. This is because we are looking at the shadow being cast, not from it. 
Second, there is no guarantee that the Moon will turn just "blood red". There is a good chance that it will, but remember what I mentioned up there; the real variable is going to be cloud cover around the Earth's atmosphere. The more clouds, the more likely it will be darker. The fewer, the brighter. In short, it could go from blood red to dark chocolate. 
Finally, there is much ado about this eclipse and the "tetrad" that it marks the beginning of. A "tetrad" in this case refers to a series of four lunar eclipses spaces at six month intervals. Usually, it is not uncommon for there to be three lunar eclipses over a one year period. This tends to be the most common pattern, a "triple". Tetrads are not as rare as it would seem, in fact. The last tetrad occurred in 2003-2004 (not quite eleven years ago). What's unusual about this tetrad is that it will be visible from the Americas. 
So, what does this mean?
Nothing.
Absolutely nothing.
There are people who are desperately looking for some sort of meaning in this, yet in reality one does not exist. Have historic events occurred near or around these events? Certainly; after all, really triples, tetrads and just good old lunar eclipses are not that uncommon. As one of my high school teachers used to say "correlation does not equal causation". In other words, they are coincidences, and nothing more. We seek answers, we look for them hard enough and think we see patterns. It is our desire to find those patterns that actually produces them. 
If you get a chance, try and stay up late to catch this wondrous event. For my friends further west, you won't need to stay up nearly so late. For us here in the east, it looks like an all nighter.
And sadly, it's looking increasingly like a no-go here in Connecticut. Clouds are rolling in, and the rain is coming. 
We'll see.

Saturday, April 12, 2014

Solar "Reflections", Part 2

As the warmer weather gets underway here in New England, I turn my attention to more things astronomical. For the first time in weeks, I no longer fear being exposed to bitter cold. While there may be plenty to do at night, I have turned my attention to solar astronomy. 
As mentioned on my entry for the 1st of this month ("Solar "Reflections""), I decided to play with an alternate method of viewing the Sun, and the initial results showed promise. One thing I failed to mention with regards to these recent attempts is that on the 29th of January of this year, there was an chance alignment that produced a solar image on the wall between the foyer and the half bathroom. It wasn't the sharpest of images, but was clearly the Sun.


I decided to make a "screen" (a cardboard box top) to see what type of image could be gleaned. 


It turned out the the source was light coming through the kitchen window and passing between the freezer and refrigerator doors and handles. 


It wasn't much of a pinhole, but it was just enough to produce an image. It was just sharp enough for me to make a simple animation of the Sun heading down.


Now on to the current work.
After my initial foray into pinpoint reflection this month I decided to try again, but this time setting going even further. Additionally, I made a dedicated solar filter and Hartmann mask for my Celestron FirstScope, and have been undertaking a series of observations with that as well. But I wanted to see to what limits pinpoint reflection could be taken. 


As I had already set up for my daily solar session, I felt that it was also the best time to try for a projection into the house. With the Sun at such a high angle, it was guaranteed to be much brighter, and therefore able to provide that much more contrast. It was almost 13:00 EDT, and the Sun rode high.
I chose to set up, as I had before, on the back porch, taking advantage of the recently unpacked table to mount the pinpoint mirror. As I mentioned in the previous piece, this is a small fragment of a first surface mirror, but what is important to note is the size; not quite 5 mm square. In my first attempts back in the autumn of 2013, I had reduced that area to a point 3 mm in diameter. Since then, the paint has come off. While we may have lost some detail, we gained contrast. 


I set up my drawing pad and easel on the dining room table. Total distance between the mirror and the paper was perhaps 9 meters (30 feet). The resulting image was around 125 mm (5 inches), but a measurement wasn't taken. The solar disk showed, but didn't provide enough detail.


For my second attempt, I slowed my camera's shutter speed. This allowed for a little more contrast. Something began to show up. The third attempt was pretty much the same.


It was at this point that I decided that what was really needed was more distance between the mirror and the screen. I chose to go another 2.4 meters (8 feet). This resulted in the easel being set up straddling the kitchen sink. Here, the details started to become a little clearer. Sunspots were beginning to become visible. 


After adjusting the the image's contrast and light levels, the sunspots in the Sun's northern hemisphere became very visible. The small group coming around the Sun's western limb was even there, albeit faintly. 

North is to the left in the projected images.

Compare this to the official Space Weather image for today.


By this time, high altitude clouds began making rolling in, so I put away my gear and waited. 
At a few minutes before 16:00 EDT, I decided to go even further afield, this time into the yard beyond the porch.


My "screen" was taped to the wall in the living room. Overall distance was now about 18 meters (60 feet). The projected image was around 200 mm (8 inches). There were still some high altitude clouds, but not as bad. Not surprisingly, some work with the image still needed to be done. While some of the contrast was lost, after the image was worked, the sunspots once again showed very clearly. They were, however, noticeable to the naked eye.


Perhaps what is really needed is a lot of distance and a very dark room into which the image is projected. No doubt larger sunspots would show even better. 
Still, I think we can call this little experiment a success. If anything, it was fun.