My interests in the very early history of solar astronomy has been documented on these pages before. I wanted to explore some more, so I set out to replicate the early solar telescope designs of
Christoph Scheiner.
While many of his theories about cosmology were wrong (he was an ardent supporter of the geocentric model that the Catholic Church at the time held as dogma), and he was initially wrong about sunspots, he did produce the first practical solar telescope.
He called it "machina helioscopica".
The design went through two iterations, as found in the pages of Scheiner's work "Rosa Ursina". The initial design simply had the helioscope supported by two legs.
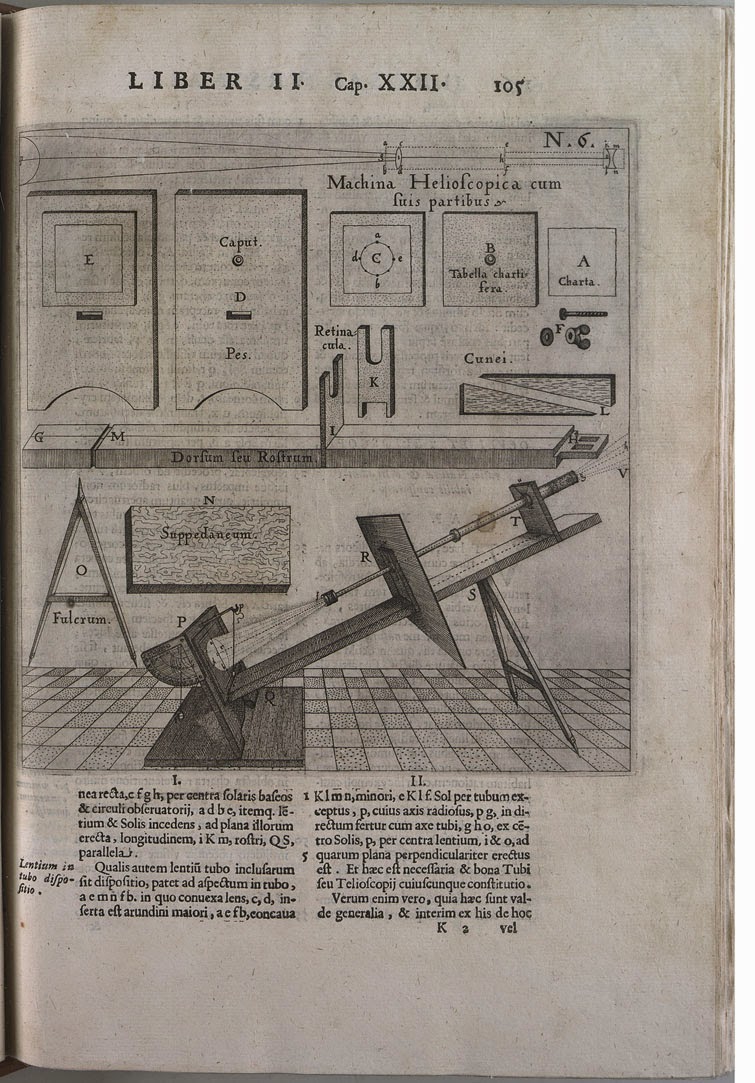 |
| Image from "Rosa Ursina", courtesy Wikipedia |
Later, he improved the design, making in the process one of the first equatorial mounts.
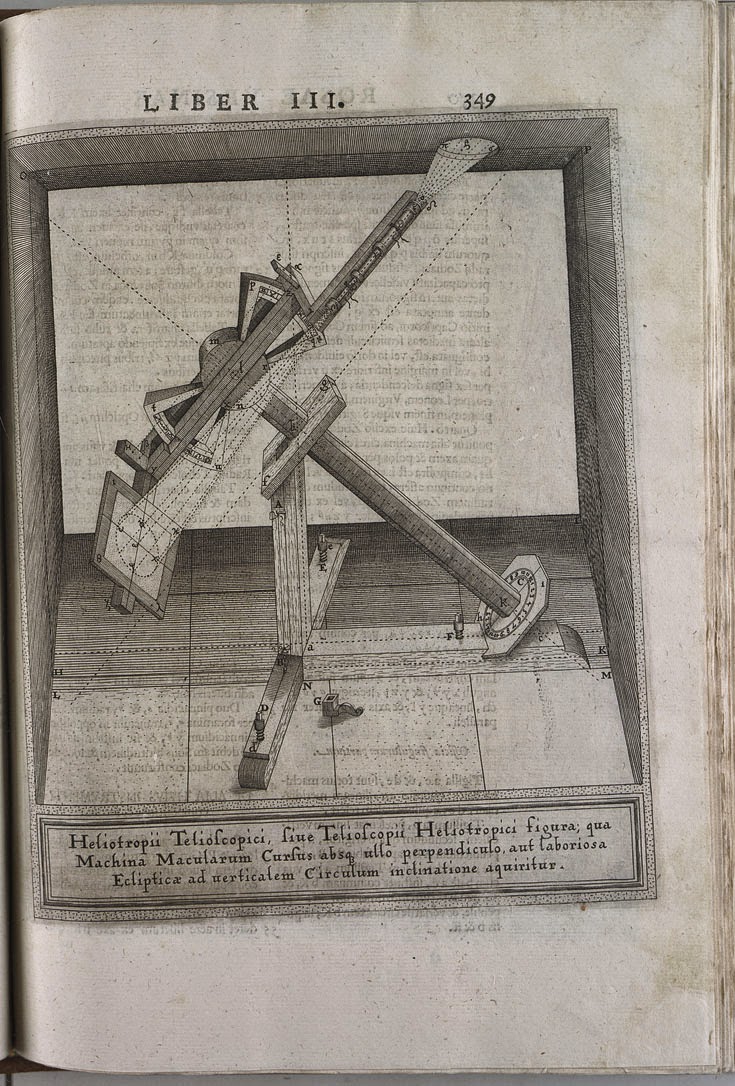 |
| Image from "Rosa Ursina", courtesy Wikipedia |
Common to both is how the telescope and screen are joined in unison, a backbone of sorts. This technique is still in use to this day for solar studies, namely sunspot counts.
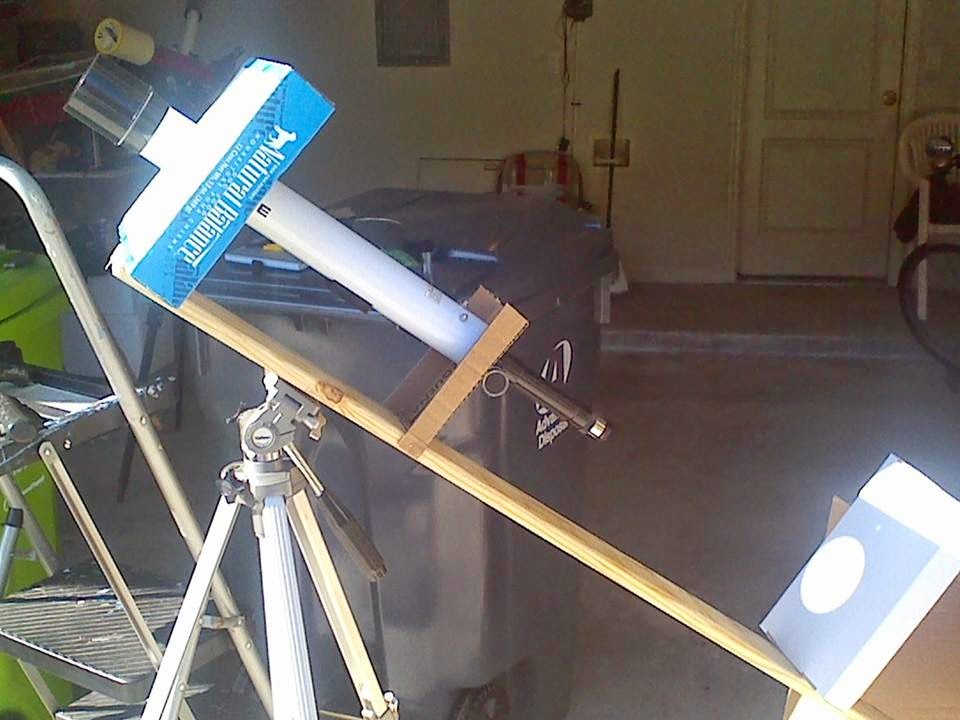
I set out to make an improved version over my experiments in 2013. This will ultimately lead to a permanent setup, akin to his later design. For now, the setup will be like his earlier design.
I used a piece of lumber, a 1"x4"x60" (25mm x 100mm x 1.524 meters) as the backbone.
My initial setup was with cardboard, a proof of concept, to see how the entire design would work.
Two of my telescopes were used for this first test setup; my old Tasco 25x-50x 40mm zoom telescope-
And a Meade 40mm f/15-
Both telescopes worked well. There were concerns about the Tasco telescope, however. When first used, the images were a little dark. However, when used again, the images seem to work better, definitely more contrast. Incidentally, these images do not do these images justice.
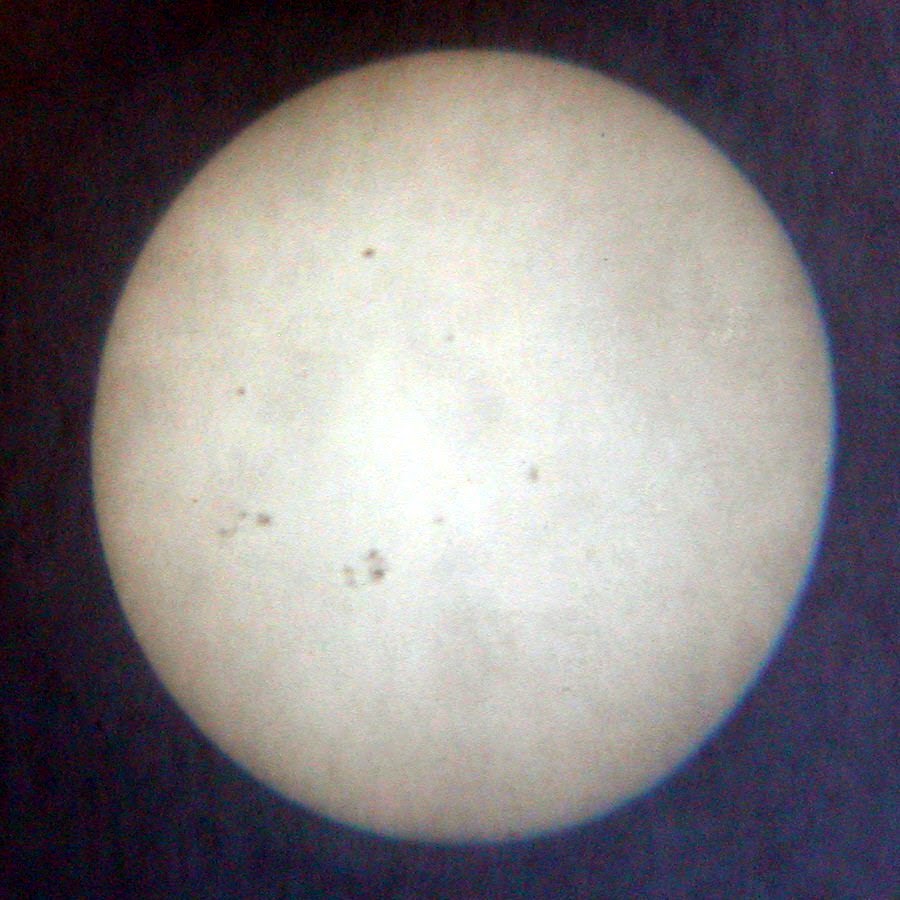 |
Initial Tasco zoom telescope image, with levels adjusted.
This is how it appears to the eye. |
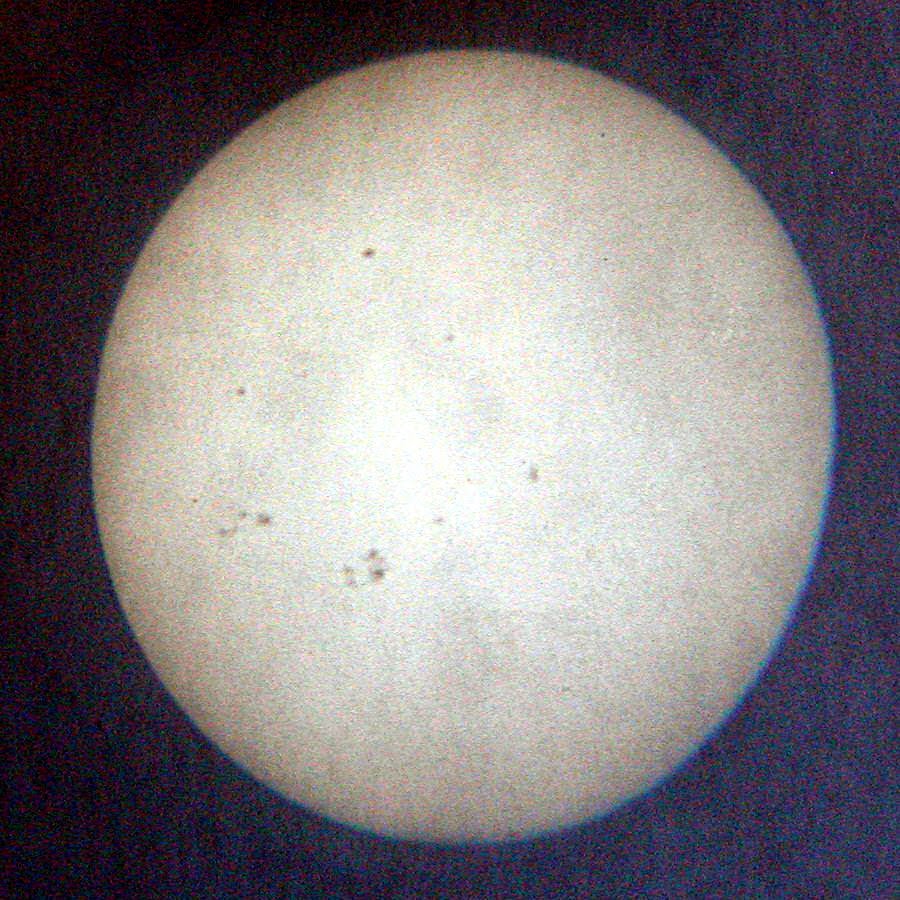 |
| The image processed a little further to bring out details. |
The positions for all the components were worked out.
For instance, I discovered that I needed the projection screen closer, as I planned to use a smaller one, for projection of a 100 to 125mm solar disk.
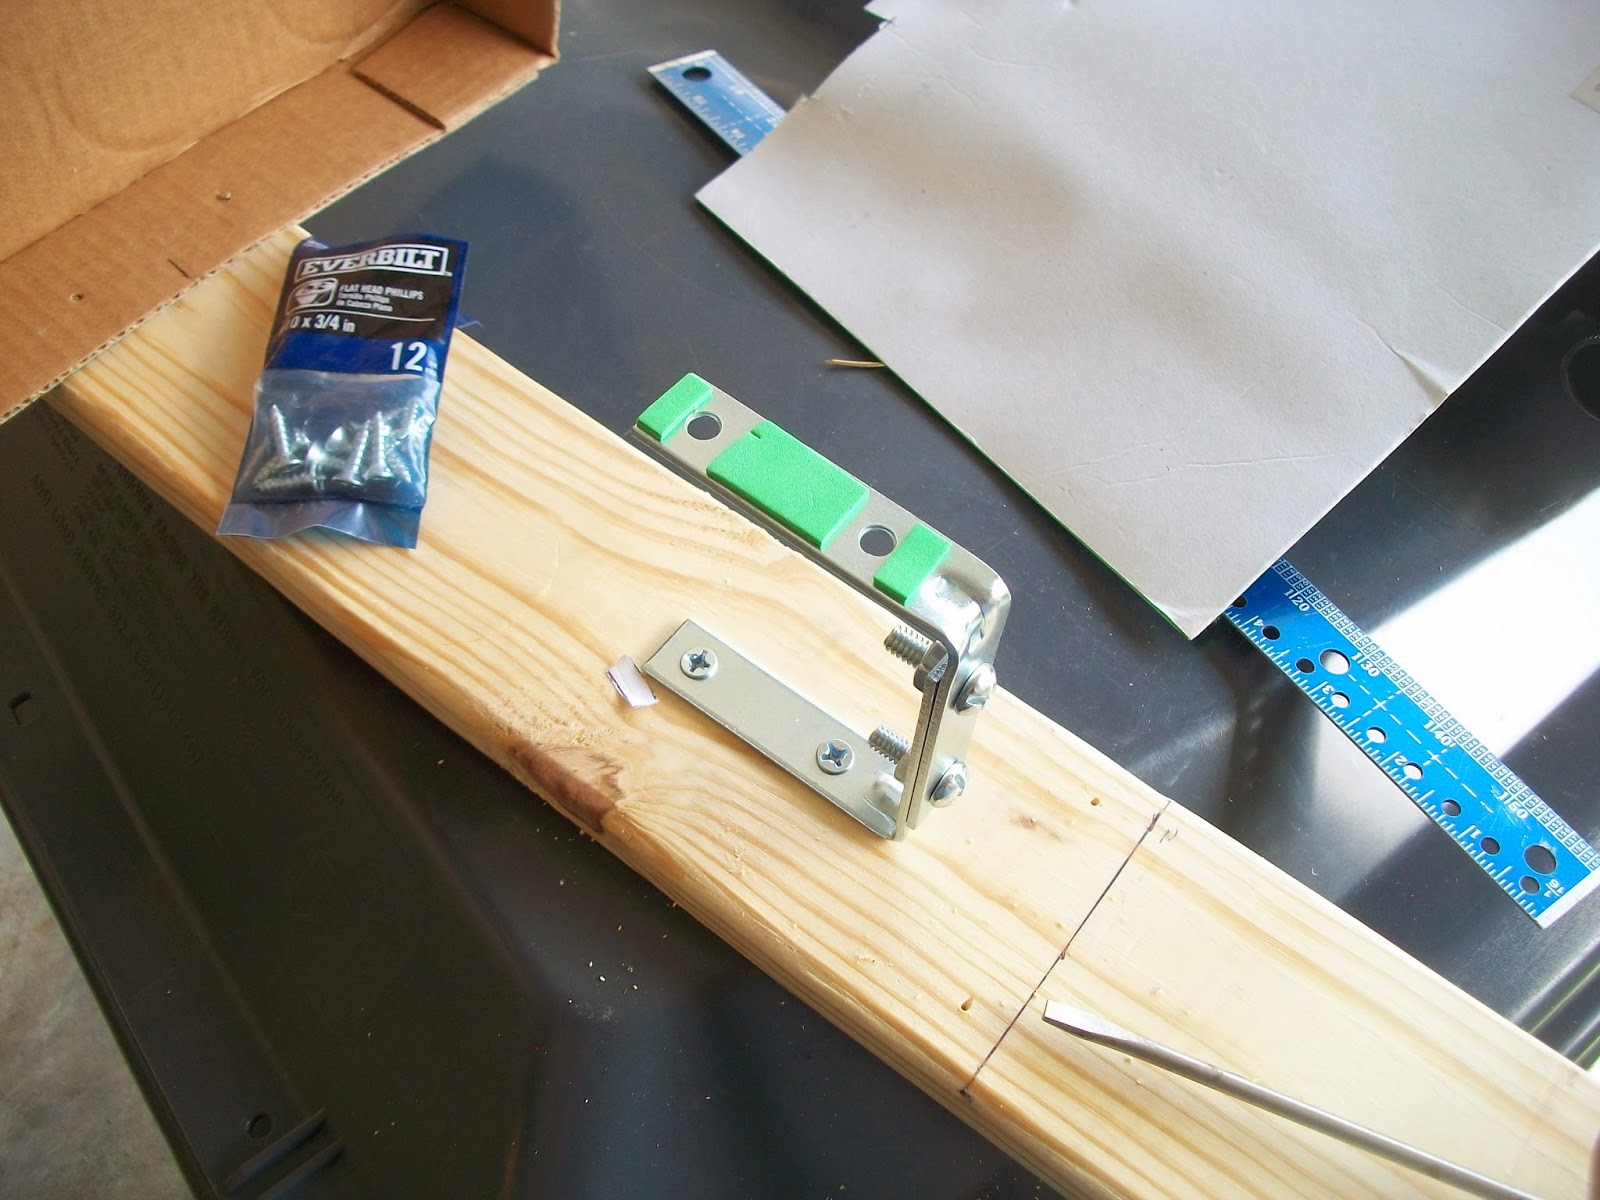
Once all of the positions were determined, work on the improved helioscope began in earnest. This mount would be designed to hold the telescope in two methods; either with a 1/4"-20 bolt, or a hose clamp. To make that mount, two 4" (100mm) "L" brackets were bolted together to form a "U" bracket. This bracket was then attached to the helioscope backbone with screws. Once in place, pieces of self adhesive foam rubber were attached to the mounting surface, to protect the telescopes. The hose clamp would also be likewise covered over most of its inner surface with the rubber foam, allowing space for adjustments.
For the forward mask, I used a piece of 18" x 14" (45cm x 35cm) Corroplast sign material, cut in half to make two 9" x 14" (22.5cm x 35cm) pieces. A 2" (50mm) opening was cut in the center of the mask. As designed, the helioscope will mount the Tasco perfectly. Once satisfied, the mask was attached with smaller "L" brackets.
Once the mask was in place, it was necessary to test the distances again to the projection screen. While the design was built around the Tasco zoom telescope, I felt it necessary to test the distance with other telescopes. To that end, the Galileoscope was used, sans its forward dew/glare shield. I was reticent to do so, knowing how the Galileo's 20mm Plossl was damaged the
last time it was used for solar projection. While it didn't line up perfectly with the opening (it is a larger diameter), it did provide the necessary information.
For the projection screen, I chose a small clipboard. To mount it to the backbone, I used another 4"/100mm "L" bracket. While the bolt head does look like it would interfere, for the sized paper that will be used on this design, it really isn't a problem. With the clipboard mounted, the backbone was completed.
As luck would have it, when it came time to test the design, the weather turned fickle. However, initial tests with the Tasco telescope proved satisfactory.
The images it produced were again fairly sharp, especially when set to 40x magnification.
The problem is that the Tasco has a far more complex optic train than Scheiner would have used. It is a terrestrial telescope with a number of elements between the objective lens and the eyepiece. Scheiner would have used a Keplerian telescope with a very simple optic train, just two convex lenses, in fact. While I currently lack Keplerian eyepieces of the correct focal length, the Galileoscope with its 20mm Plossl is sufficient.
Eventually, this design will be setup with a permanent host telescope, no doubt on an equatorial similar to Scheiner's later design. In the meantime, I can use this setup for investigations into those early methods, which laid out the path that we follow to this day.
In short, it worked. And still does.